There are numerous methods to strengthen the security of our home network and one of those ways is through a bit of nifty gadget called Firewalla Red. Once connected to your network, it offers us a ton of information on what happens in it: what mobile devices, laptops, smart gadgets, and others connected to the network do. If you’re a casual internet goer and want some basic protection for your network, Firewalla Red is great.
Firewalla Red is an all-in-one solution to the difficulties we face with network security with all the many devices. Firewalla Red does an optimal job at securing all of your digital stuff by connecting to your router. It can safeguard your family from cyber risks, prevent advertisements, regulate kids’ internet usage, and even protect you when you are out on public WiFi. We’re going to walk you through what we found with this small, yet effective firewall hardware.
Incredibly Easy Installation
The app can be easily installed on your mobile device. All you need is your WiFi router and a power source, the app on your mobile device, and a barcode scanner. To get started, simply scan the barcode on the box and connect to your WiFi. You can manage and monitor your device from anywhere on the globe, thanks to this functionality. Both iPhone and Android versions are available.
Compatibility
100 Mbits is the limit for IPS functionality. Depending on your router, this gadget works well with most routers and not as well with others. For router compatibility, you can check out the website to make sure yours is on the list before getting the device. For configuration, depending on the router you may have to log in to the router to perform a handful of configurations. Overall, there should be many compatibility issues with Firewalla products. We’ve heard from users that they run into issues when using Firewalla with Google Mesh Wifi, but it took us maybe an extra 4-5 minutes of setup to overcome that small hurdle.
It’s hard to imagine, you get this much protection in a small device. Your Firewalla Red home and wireless internet of things devices all are protected by its unique intrusion prevention system (IDS and IPS) against threats, including viruses, malware, hacking, phishing, cyberattacks, unwanted data theft when using public WiFi, and a slew of other protections.
Filtering Of Content and Blocking Functionality
You don’t have to unplug the power cord from the dusty old router anymore to get your kids to stop using your network. No more wondering what devices are accessing what content. You can check out what any device is doing on your network straight from your Smartphone. Want to block all access, or block off just gaming or social networks? Done with a click. As the primary account and keeper of the network, you can easily keep online activities on your network cyber-healthy and safe by enabling Family Protect, which screens out adult content and blocks malicious content. It’s a set it and forget it feature we love.
Ability to Activate Protection
With Firewalla Red, you can get a deep knowledge of your network and cloud-based behavior with an analytics engine that identifies and blocks problems as they arise. As a result of continuous monitoring, you will have complete visibility into all IoT devices within your network and will be able to monitor comprehensive network flows, bandwidth analysis, and internet troubleshooting. Nothing is bulletproof in the world of cyber security, but we can have safe online surfing and free from hacking the internet with Firewalla Red.
Alert Messages, Configured Successfully
Once Firewalla Red is linked, you will receive the first alert messages, which indicates each of the devices it discovers connected to the network. These notifications are configured by default. Some people get annoyed with over notifications of apps and devices. I am one of those people who hate getting unnecessary notifications. But if those notifications are purposeful and lead to value, that’s all that matters. You can customize in the app AND on your smartphone device just how frequent and aggressive you want those notifications.
Keeping your gadgets safe from cyber attacks and cyber threats
Advanced information for your network
Keeping confidential company information safe
Filtering content dynamically
Client-server VPN functionality is incorporated right into the operating system.
Services are free of charge every month. No monthly fees is fantastic!
30-day return policy and a one-year warranty
Cons
Unless you have a router that is compatible with it, do not purchase it. Be sure to check first! One you’ll want to look at is that some routers (although not officially supported) can still be used, but it requires a geek in the home. Using DHCP Mode. I did when I ran my Blue with my Synology Router and was able to get it to work. But again…you’ll need a geek in the home.
Creating a VPN server can be complicated for most people, but there is a vast Firewalla community to help if you are confused
100 Mbps speeds may seem slow for internet super users. If this is an issue for you, upgrade your expectations with Firewalla Purple.
Alerts can be a nuisance until you learn how to fine-tune them to your preference.
So…Should You Get Firewalla Red?
Despite having a few cons, Firewalla Red is a fantastic product that we highly recommend! You can secure your home networks with this stylish, comfortable, and practical solution. Many folks will breathe a sigh of relief knowing they can have a simple home network security option like Firewalla Red. The Firewalla app allows you to share data, hide your IP address, and secure your network, all from the convenience of your mobile device (making it very accessible). Custom settings give you more control over the security of your home wireless networks while also providing you with greater transparency into the choices you’ve made.
There is a lot of talk out there about VPNs. Should you get one? What are the benefits? I’ve heard they slow down your connections? I’ve heard they are the best protection you can get. Trust me, I’ve heard them all. There’s a lot of noise. Some of it is good noise. And some of it not. We want to set the record straight and talk about the pros and cons of using a VPN.
A VPN, or virtual private network, is a service that creates a secure, encrypted connection between your computer and the VPN provider’s servers. This can be useful for many purposes, from safeguarding your internet traffic from prying eyes to accessing region-locked content. However, not all VPNs are created equal, and it’s important to understand the pros and cons of using one before deciding whether or not to invest in one. In this blog post, we’ll take a look at the pros and cons of using a VPN so that you can make an informed decision about whether or not it’s right for you.
What Are The Cons Of Using A VPN?
Before we hit on the good things about VPNs, we want to briefly dive into some of the cons. Some of the negative banter you’ll most likely hear are half-truths. And they’re partially true because VPNs are a dime a dozen. There are so many of them out there. There are free ones, paid ones, good ones, and bad ones. Basing a single experience on a single VPN service just doesn’t do the idea of getting a VPN justice. But generally speaking, let’s discuss some of the cons you might experience when dealing with VPNs.
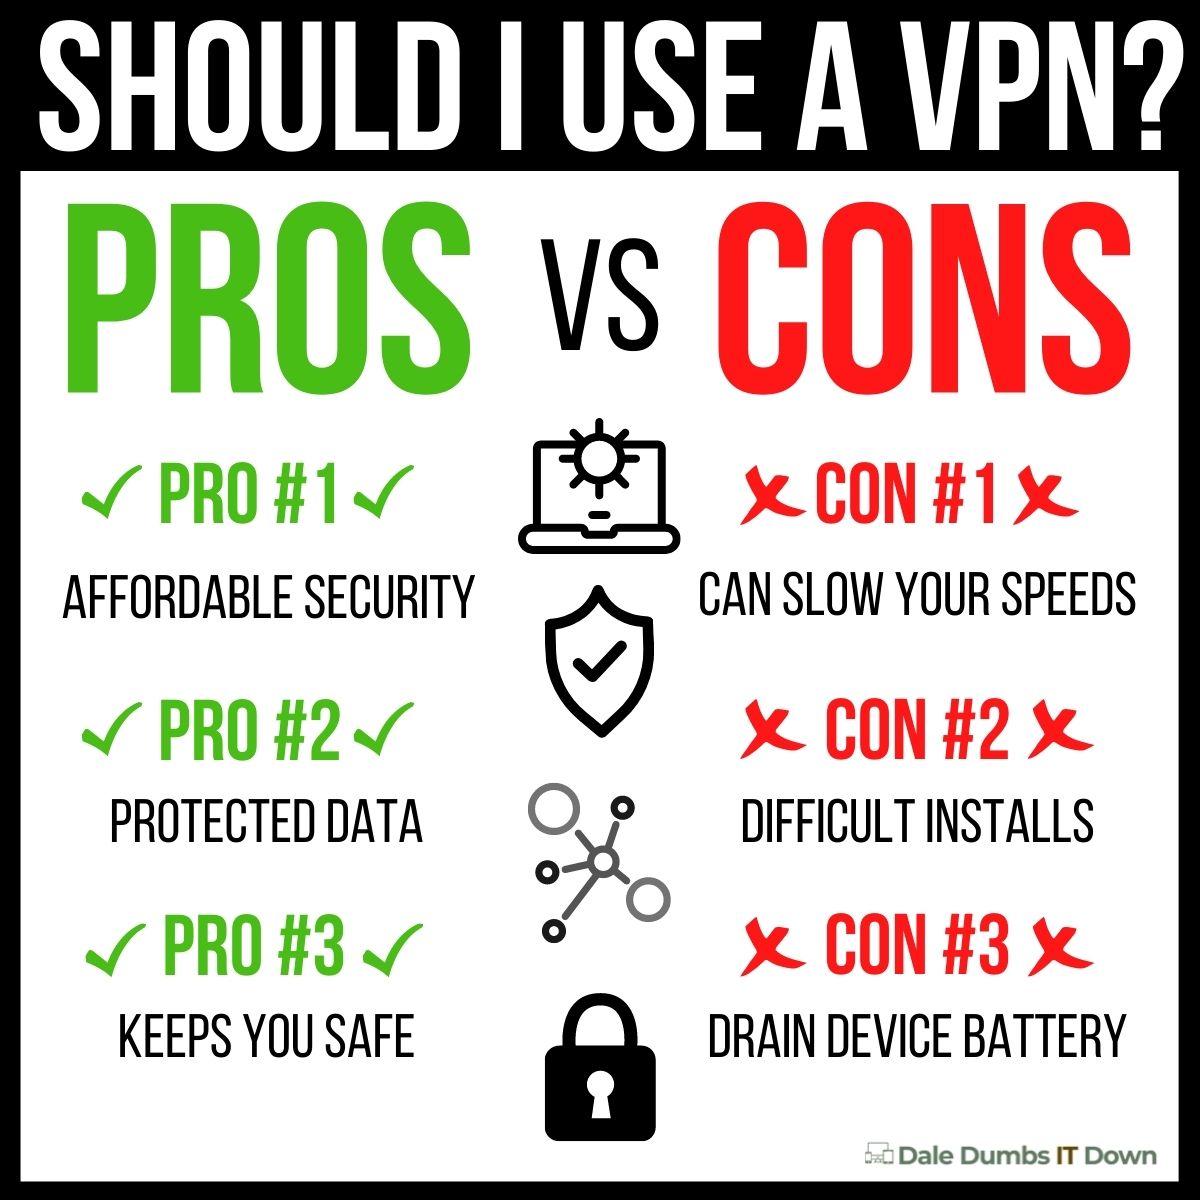
VPNs Can Slow Down Your Connection Speed
This is true, BUT…it depends on the type of VPN you get. Most of the paid versions (and some of the free) can handle 1 Gbps speed or higher. Most people that experience a slowed connection probably have opted in for a free version.
They’re Difficult To Setup
This was definitely true in the infant stages of VPNs because most people using them were the techy-type and knew their way around this kind of technology. Of course, someone who is an average user of computers and the internet would struggle with new technology. But as more VPNs hit the market, we’re beginning to see companies get really good at customer experience, so the setup and configuration aren’t nearly as bad as it was only a handful of years ago.
VPNs Can Drain Your Battery
This applies mostly to your smartphone devices (and tablets for that matter). A big reason why this is the case is that apps that run continuously on your phone in the background naturally will have the most impact on your device’s battery. Just going off what my iPhone says, my VPN uses about 15-20% of my battery on average. It’s about the 3rd highest app in battery usage as well. And that’s been pretty consistent. But again…apps like Facebook, YouTube, NBA2k Mobile, and even your messaging apps will drain your battery, soooo.
VPN Connections Can Just Poof
This will happen from time to time and I’ve experienced it with a couple of free versions. This is why a kill switch option is a really nice feature to pay attention to. Hotspot Shield has a kill switch and is free. Most of the paid versions have this added benefit as well. Without getting into the complexities of kill switches, the idea behind the kill switch is really simple. Basically, if the VPN connection drops, you can activate a “Kill Switch”, which blocks your device’s access to the internet. It’s nice because this can prevent you from having that device send data outside your secure VPN. It’s a nice feature that most VPNs should have in case the VPN server drops. At any given moment, your secure connection to a VPN server can be interrupted, which in effect can reveal information that was private. Information like your IP address, your location, and some other personal data. You’re going to want a VPN that has an “Always On” option in their settings for a kill switch.
They Give People A False Sense Of Super Security
They are not full-proof protection from cyberattacks, personal data protection, and viruses on the web. Quite honestly, I don’t think I’ve ever come across something that is completely bulletproof from the dangers on the web. But the notion is such that some believe they get a VPN and they’re completely protected from anything nefarious on the web. That’s just not true.
There are seriously so many awesome benefits you get out of using a VPN. Benefits range from increased security, encrypted personal data, hacker protection, escaping data caps on your internet, and so many more. But we wanted to highlight some of the best Pros as to why you should get a VPN.
VPNs Are Affordable Security
This is one of the major perks of using a VPN. Compared to other security measures, VPNs can be significantly more affordable than other security measures. There are a handful of free VPNs out there that make security virtually free. Hotspot Shield and ProtonVPN are a couple of free VPNs you should check out. Even the paid versions are relatively cheap. ExpressVPN’s paid service right now is under $7 a month and Norton VPN is $40 for the whole year with up to 5 devices for protection.
A VPN Protects Your Data
This is such an incredible benefit. VPNs will help protect the data that you send and receive on your devices. Again…it’s not bulletproof (nothing is), but with the encryptions VPN services offer, it definitely makes it harder for hackers. They don’t necessarily work the same way as fully comprehensive anti-virus software, but they will protect you if you have healthy digital hygiene (stay away from phishing websites, don’t download compromised files, etc).
Access Content From Virtually Anywhere
This will depend on how many servers your VPN service offers, but generally speaking if you opt-in for a paid VPN, you’ll be able to access blocked content from anywhere in the world. I remember one time on a long vacation to another country we literally had Netflix blocked the whole time. You could argue that we shouldn’t have been watching Netflix on vacation, but nonetheless…a VPN will allow you to access any streaming service from any country. Furthermore, it’s not just streaming services. You can bypass almost any geoblock. Geoblocking is tech that will restrict your access to the internet and websites based on your geolocation.
Should You Get A VPN?
If you’re someone that regularly uses the internet, buys anything online, or does any kind of banking online, VPNs are a great way to increase your security and privacy. They work by creating an encrypted tunnel between your device and the VPN server, so that no one can see your traffic or track your activities. They’re not perfect protection, but they’re pretty good.
How important is it to secure your home WiFi network? One thing I notice is a lot of people I know do not have a secure home network. Whenever I ask why this is the case, most of the time people are just confused and don’t think they’re “techy” enough to do these kinds of things. It’s so easy though! If you can read and follow basic instructions, you got this! There are so many ways to secure your network, but I wanted to walk you through five of what I think are the easiest and simplest ways to secure your home Wi-Fi network. You want to make sure your home is a safe place to get online, right? This is also an important approach to adding one more layer of protecting your devices and your personal data as well. This is so easy you can literally do this in about 5-10 minutes, even if you aren’t the “tech type” and don’t speak geek. Your network security in your home is vital. And it’s one of those often overlooked safety measures. Privacy on things like your mobile devices, tablets, computers, laptops, and smart devices could be compromised by even the most novice hackers.
It’s pretty crazy how many people just use the basic setup for their home network and forget about it. They take the password and the SSID that they were given by their Internet provider (probably written on a box for the world to see), and that’s what they use. If this is you (we’re not judging by the way), you’re definitely going to want to take notes immediately after reading this. Make these adjustments! Promise? Okay. Are there more advanced steps to making your network and home WiFi more secure? Sure, but I just want to share with you a handful of basic tips you can do right now. First things first, you’re going to want to be by your router. We’re going to begin this process there. We will be making some of these security steps in the network settings. Most of them will be in the same place. Your router is going to look something like this….
Protecting Your Home WiFi Tip #1
You might want to go where your router is located to help get a visual of what we’re talking about in this tip if you want to. It’s not necessary, but it might help. You want to be looking at your router in order to find the information to log in to the administration panel. With most routers, the login info generally is going to be on the bottom, on the back, or the side where you can find a six or seven-digit code along with a password that’s printed on it. The info will also be in a manual (and you can typically Google your router model number and find it online). Usually, it’ll say something like “Router Login” or something to that effect. I’m not exaggerating when I say my login settings have the username as “admin” and the password as…yes…“password”.
What you’re looking for, or the first thing that you want to change is the SSID. This is the ID that comes up when you’re searching for Wi-Fi. What you may not realize is that a lot of these IDs can be tied back to the manufacturer of that particular router. Scary? Yeah, no doubt. Some routers may have known vulnerabilities. Hackers know this and if they see that particular ID will know exactly how to hack it. In addition to this, the default SSID may also be an identifier to know which Wi-Fi is related to a specific house that might be really expensive (or have valuable inside of it). It’s something someone with technical know-how and expertise might definitely want to hack into. They have their checklists, they have their processes down to a science, and SSID is an easy entry point into your personal data. These dangerous people out there exist. What you want to do is just rename your SSID name. Try not to make it too personally identifiable. You’ll want to avoid making it your name. Don’t imitate a private network. I see this a lot and it just invites people to join, which will slow download and upload speeds. Use a little common sense. A lot of people like to have fun with these SSIDs and that’s not a bad thing, but it’s best to err on the side of caution and keep personal stuff out of the SSID. Honestly, just changing it is going to add a layer of security. But make sure you know exactly what it is. This won’t make your home WiFi incredibly secure, but a small change like this can help quite a bit.
How Do I Change My Home Wifi Name?
This is really easy. These instructions are general for most router types. You need to access your router’s admin page (you can find this on the back or bottom of the router).
Step 1: Enter the router’s IP address into your favorite browser
Step 2: Log in as the administrator. You can find that info again on the router.
Step 3: Click on “Settings” (or similar verbiage) and you’re going to want to find the option “SSID Name” or “WiFi Name”. It should be one of those options.
Step 4: Enter your new WiFi name (follow our guidelines above). In some admin panels, you’ll have to hit save or “apply”.
While you’re in the router admin settings, the next thing you want to do is to set up a new, more secure password. Most likely, your Internet provider gave you a password, then set up your Wi-Fi with password protection. And that’s fine, but you really want to do something a little more secure and something you can keep track of more easily.
A couple of things with this. First, you want to create a strong, unique password. Do NOT create a password like one of these common Wifi passwords (and yes…these are legit passwords and I can’t believe people actually do this, but they do). Personally, I use a password generator and a password manager like Keeper or Zoho Vault, but there are a lot of really good password managers out there. Secondly, in the same place where you changed the SSID, you’ll want to change the old password with this new password. It’s usually in a field called “Password” or possibly “Passphrase” depending on the brand and type of router. Once you make those changes, press “apply”.
Protecting Your Home WiFi Tip #3
While you’re still in those admin (or advanced or something similarly named) settings for your router, another thing you want to look at is disabling remote access. It’ll usually be on a “Security” tab or something close to that. You’ll want to find a navigation label with “Remote Control” or “Remote Access”. Honestly, there are very few times when I’ve used remote access for my router. I can’t remember the last time I’ve used it to tell you the truth. What is remote access? If you’re not physically present near the Wi-Fi router (can’t access the signal essentially), remote access gives you the ability to dial in from another location. As I said, I’ve rarely used it and most people never do anyway. It’s just an extra vulnerability you don’t need for your home network. For most people (like 99% of the population), it’s an advanced feature. You’ll want to disable that feature and click “apply”.
Okay, this next one is really easy and I think is probably the most important. If you have a lot of guests (think extended family, friends, visitors, etc), one of the things that happen is you tend to give out your Wi-Fi password. My wife literally just did this today with an extended family member and I had to remind her why we have a Guest Network. What happens is that Wi-Fi password gets stored in their devices for a long time (probably indefinitely). If you were to look into your Wi-Fi settings right now on your smartphone, tablet, or laptop, you’d find quite a few networks that are stored and saved on your device. What this means is they also could potentially have access to your home network, depending on how it’s set up. It’s not just the internet they get access to either. It could even include your internet of things (IoT) devices like your Alexa or your Google Assistant. Or perhaps your smart lights and smart thermostat. Maybe even your security cameras. All of these things.
So this home network security tip is really important: create a separate guest WiFi network. This can be done in a number of different ways (I love how easy Google Wifi has made it). But you’ll want to set up a separate Wi-Fi network for guests and other people with a different password than your main WiFi. What this will mean is you will have a Wi-Fi network that’s secured specifically for your family and your devices. And then a separate network for any guests that come in. The next time you have guests asking for the WiFi network and WiFi password, this way you’re not giving away your secure password that might be used for other things like email, banking, etc. I once had a friend who used the same password for everything. As a teaching moment when he gave me his home WiFi password, I tried the same password for his email and immediately accessed his email. I let him know, of course, and encouraged him to immediately change them all. If you use something like Google Wifi, Apple AirPort, or some other advanced routers, they have an option for a guest ID, which makes it super easy to set up. What I LOVE about these is it sets up a completely separate Wi-Fi network, so guests don’t have access to your home network at all.
Protecting Your Home WiFi Tip #5
Lastly, this one is by far the easiest. This is something probably not done that much but can be important. Depending on the level of home automation and what kind of smart devices you use, it might not be applicable to you at all. If you’re going on a vacation or you’re leaving your house for more than just the regular hours of work or possibly for an extended amount of time, it can be a great idea to turn off your Wi-Fi. There’s no reason to have your Wi-Fi on, especially if you don’t have a lot of smart devices. Even if you do have an Alexa or Google Assistant, it may not be a bad idea to turn the WiFi off. These devices can act as other access points to your home network. There is one caveat though: if you have a smart thermostat, a Ring camera (or something similar), smart lock, or a smart lighting system programmed or scheduled to keep burglars away, you won’t want to utilize this last tip. But if you aren’t into the home automation stuff and don’t have those extra security measures leveraging smart devices, then turning your WiFi completely off when you’re going to be away for an extended period of time is a really useful tip. We would highly recommend that you do get into the home automation space and begin to learn how effective smart devices and smart technology can help make life a little better.
Is enabling a content filter through a DNS an effective approach to protecting your family from the explicit nature of the internet? We wanted to briefly talk about something we’ve seen recently that is a unique approach to creating a filter for your internet. Content filters are actually a really good way to help protect your house from a lot of the negative things existing there. It’s definitely not a perfect solution. But it’s just one more effective measure we can take to help filter out the bad from coming into our world.
What is DNS?
The Domain Name System (DNS) is the phonebook of the internet. Humans access information online through domain names, like NYTimes or ESPN. But web browsers interact with IP addresses instead. DNS translates these into a human-readable form so that they may load resources on websites including articles from any site without needing to memorize an address which can become outmoded over time.
What Is A DNS Filter
A DNS filter blocks a website that it believes is harmful or is hosting malicious content. By blocking access, you can prevent your computer (or any device connected to your network) from downloading and executing potentially dangerous programs on the internet. This way they won’t have any opportunity of infecting one of your systems with malware because they will not even get through! And it’s not just malware either. If you want to block or filter social media sites, or video sites, or gaming sites…it’s easy to do so.
A lot more goes into determining what websites are deemed “bad” than just their URL alone, so these DNS filters check many other factors before deciding if an IP deserves isolation.
Let’s Talk Content Filters
What is content filtering? A content filter is a use of a program, software, or app to filter or “screen” out access to certain web pages (and email) that are defined as bad. You would install a content filter or enable a content filter for your network. In most cases, a program is going to help you select different categories you deem inappropriate for your house to view on the internet. What this will do is help you control content with all the devices in your home connected to your network. So if you want to make sure that pornography or anything like pornography is blocked from the internet in your house, then you can checkmark it. Let’s say you have somebody in your family that suffers from gaming addiction, you can make sure that gaming sites are blocked in your house.
A content filter is really just going to help you block the things your family sees as negative or inappropriate. Although you install a content filter on your network instead of on an individual device, we highly recommend still installing programs at the individual device level for added protection. But when you install a content filter on the network, it’s actually going to cover every device in your home (at least those connected to the network), so this means smart TVs, gaming systems, mobile devices, and tablets; basically, anything that has a screen which could give one access to the internet. A content filter is going to help protect all of those devices. even the ones that might not have a good monitoring app built into them like a gaming system.
Should You Add Content Filtering At The DNS Level?
As always, you should do what’s best for your family. What might be acceptable in one family might not be acceptable for others. We’re all about multiple levels of protection. Kids are smart. The folks behind getting the bad content in front of our eyes are even smarter (heck…most of them make their living doing it). In almost any situation where we’re trying to protect and monitor internet use in the home, there is probably some method or idea to circumvent that protection. People and brands (good and bad) are always competing for eyeballs because eyeballs mean cash. But…sometimes what is put out on the internet isn’t meant for everyone.
Guess what? There really aren’t many perfect solutions to this. And because of that, every little level and a layer of added security is just one more weapon in our arsenal to help us accomplish our goals with proper use of the internet in the home. Should you add content filtering at the DNS level? Absolutely. Is it a perfect solution? Far from it.
Does your smartphone track your private data? Does it collect personal information and share it with third parties? You bet. Does this sound familiar? We are going to talk about one easy trick to stop your iPhone or Andriod apps from tracking your private data
You and a buddy are talking on the phone or maybe in person and you mention you’re thinking about buying a home. The next few days you see a ton of real estate ads on Facebook and/or websites about buying a new home. A recent study of nearly 1M smartphone apps gave us a little insight into how our personal data is shared. It’s estimated that nearly 90% of our apps transfer information back to Google. While the data flow to other tech companies isn’t as high as it is with Google, they still get in on the personal data action. Facebook, Twitter, Verizon, Microsoft, and Amazon all want in on that information and they pay for it as well. With iPhones, nearly two-thirds of their apps collect some type of data that is linked to data collected by another third party (like a personal data broker or ad network).
What Data Do Smartphone Apps Collect?
Honestly, who knows. Our smartphone devices are smart. They do a ton of amazing things. In fact, if you could go back in time 20 years and tell yourself all the cool things your smartphone can do, your back-in-time self would most likely not believe you. Most apps do collect some personal information about you and your device. It’s not unlikely that your name, physical address, email address, phone number, and exact location are being shared. It’s estimated that about half of our apps request location tracking. One time, one of my kids downloaded one of those candy-crush-type apps and it wanted access to the phone’s location. It was quite funny. Is that frightening? It can be when looking at it from a high-level perspective. There are some apps that use and access your smartphone’s camera and microphone as well. Some apps keep a call log. Some read and store your SMS messages. There are literally millions of data points that can be collected.
How Often Should You Do An App Audit?
Honestly, it depends. If you are the type that downloads 10-12 apps a year, then maybe doing an app audit a couple of times a year isn’t a bad idea. An app audit is simple. You just dive into your smartphone’s settings (more on that below) and do a personal inventory of what apps you have installed and what they have access to. You have to assume those apps are collecting personal information. On the flip side, if you have a kid (and we know how kids are with downloading apps) with a smartphone device that regularly downloads apps you may want to perform an app audit each month. And don’t rely on monitoring software to manage permissions for you. Some services might have that feature, but it’s still a good idea (and smart parenting) to manually go through your kid’s smartphone and get a feel for what apps have permissions. As a guiding principle, we usually ask a few questions when doing an app audit: What information and permissions does the app have or is requesting? Am I okay with sharing my personal information with this specific app developer? Does this app need all of these permissions? (i.e.Does Candy Crush really need to know my exact location?) This is a pretty good framework to operate from and really gives you a multi-dimensional perspective on making common sense judgments about the kinds of permissions you can and should allow based on the purpose and functionality of the app. When we first heard of doing an app audit, it was kind of laughable. But now…it’s almost crucial in the smart world we live in.
Android Instructions On Restricting Apps Access
Please note that these instructions may vary depending on the model of smartphone you use, but generally speaking, it’ll be very similar across different devices. For Android users, you’ll want to open the Settings app and go to Apps & Notification menus. Tap on the smartphone app you want to adjust then tap on Permissions to see every little detail that the app has access to. In some cases, certain permissions are vital for the proper functioning of the app, so be judicious in what permissions you allow or don’t. Probably not smart to disable your camera and microphone with Google Meet. You can also get a bigger detailed list by tapping App Permissions on the Apps and & Notifications window. A little warning though, some apps will perform differently once you remove permissions. If the app is super buggy after you’ve adjusted permission, you may need to go back and adjust again. It’s up to you.
iPhone Instructions On Restricting Apps Access
Turning on and off app permissions in the iPhones iOS is really easy. It might vary from iOS versions, but the idea is very similar. This was tested in iOS 15. In the Settings app, tap on the specific app and determine which features you want it to have access to. When it comes to tracking you, you’ll need to perform a secondary adjustment. In the Settings app, click Privacy, the Tracking. From here you’ll see every app that is requesting to “Allow Apps to Request to Track.” You can toggle that on and off for every app on your phone. This is up to you. But if you do toggle it on, from here you can allow each app access to track you.
Non-Mobile Device Apps Permissions
It’s not just mobile devices either. Windows and your MacOS do the same thing. They share data with any third parties. Granted, there is an element of making the user experience more personalized, but do they hide behind this mantra? Most likely. You’re kidding yourself if you think they aren’t selling your personal information to third parties. For Windows 10, click the little cogwheel on the Start menu to open your settings. From here, select Privacy to see all of your installed apps and what each of them is allowed to have access to. You can filter/sort by location, pictures, cameras, and so forth. For each permission, you’ll see a list of apps and what permissions they have. From here, you can turn off access completely. Be aware that in some apps you’ll want to have access to certain features. For example, it’s not a bad idea to allow Zoom to have access to your microphone and camera. For macOS, the process is really similar. In fact, it’s a little easier than Windows. Open your Apple menu, click System Preferences, then Security and Privacy, and open the Privacy tab. From here, you’ll see all of the permissions. You’ll be able to see in the left pane which apps have which permissions. To make any changes, click the lock icon on the lower left, enter your macOS user and password, then unselect the box next to each permission you want to adjust.
To Track Or Not To Track? That Is The Question
Believe it or not, in some cases, you might like an app tracking you. Google Maps, Apple Maps, AccuWeather, Walmart, and other apps it’s integral that they track you to function properly. It really is a personal choice on who you allow, what you allow, and how much you allow to track you. One of the more unique spins on personal data is that you should be paid for it and apps (especially social media apps) should reimburse users based on information they share with third parties. In this regard, your personal data is a form of digital currency. Should you block access? It’s a personal preference. We know some people who actually prefer ads be served to them in a personalized matter. If I’m in the market for a home or in the market for a snowblower, and Facebook (or Google) through their programmatic exchanges and smart ad delivery systems can present a relevant ad that will improve or enhance my life because they know what I’m in the market for, is that hardly a bad thing? It’s debatable. But again…allowing apps to track really is a personal preference.
Show me a child with a phone/tablet and no limitation, and I’ll show you a child that struggles with some type of addictive behavior. But, come on, even us adults will struggle if we don’t understand our limitations. That being said, let’s talk about Apple’s Screen Time.
If you haven’t set up Screen Time on your Apple devices, you’re missing out on one of the best functions of Apple’s iOS. Indeed, one of the best features of Apple’s iOS is the Screen Time program. This easy-to-set-up feature is one of the best tools for parents to help manage their family’s access to the web, apps, and just general parental controls. Granted, it’ll only work with other Apple devices. For example, if you’re trying to work Screen Time from your iPhone on your kid’s Android device, it won’t work. With Screen Time, you can keep an eye on how your kids spend time on their devices, and you can also set limits to help them get the right balance. It’s not a high-level, intrusive program but a workable alternative if you’re looking for something to help manage your family’s time on their devices.
What It Does. What It Doesn’t.
Screen time will allow you to place restrictions on apps, schedule downtime, create content restrictions, give you reports on how you’re using your devices, and a bunch of useful functions to help manage your screen time. What it won’t do is monitor who your kids are calling (although you can place restrictions on contacts). It won’t monitor what they’re saying in text messages. If you’re trying to use Screen Time to do those kinds of functions, you won’t find it. Instead, you’ll need something like Bark, OurPact, Circle, or MMGuardian.
Setting Up Screen Time
To set up Screen Time on your kid’s device, they will need to have their own Apple ID. You both need to be part of the same Family Group in Family Sharing as well. You also need to turn on Screen Time on your child’s device, which you can do from your iPhone (or your iPad). We prefer doing it all from the iPhone. The next steps are super simple. Then, add a Screen Time passcode to access certain features. Do not share this passcode with your children. Another important tip is this passcode should be different from your main device passcode. Below, we’ll briefly show you how to review your kid’s device use (and yours), add app limits, and schedule downtime.
Monitoring Your Child’s Device Usage
How your child uses their device is something you should have a firm understanding of. We have weekly discussions about our screen time use. On your device, go to Settings, then scroll and tap Screen Time. From here, tap your child’s name. You’ll see their weekly activity summary. Tap See All Activity to learn more, like which apps they use the most, how many times they pick up their device, where they go on those pickups, and which apps are sending the most notifications. You can view these stats based on a full week or just focus on today. Reviewing these stats each Sunday has led to many interesting and constructive conversations with the family.
Limiting Time With Certain Apps with Screen Time
What if you do want to put some time limits on some apps? If you want to limit how much time your child spends on certain apps, you’ll love Screen Time. You can set time limits on individual apps or on app categories, like games, entertainment, and social media. It’s really easy to set up.
To create these time limitations, you’ll need to do the following:
Tap App Limits.
Tap Add Limit.
Then enter your Screen Time passcode if prompted.
Now select the app category you’d like to limit. Or tap a category and select apps to set individual limits.
Then, tap Next. From here, set a daily time limit.
You can also customize app limits for specific days of the week and block the app for the day once the limit expires.
When you’re done making changes, tap Add.
Additional Scheduling Features With Downtime
If you don’t want your child using their device at certain times of the day, like bedtime or during school, you can schedule what is called “Downtime”, which will block selected apps and notifications. This is probably one of the most effective parental controls with Screen Time. To do this, tap Downtime, enter your Screen Time passcode if prompted, and tap the switch to turn it on. From here, you’ll want to choose which days you’d like to schedule downtime and pick a start and end time. We’ve customized downtime, so the kids have a little later start on the weekends vs. weekdays. During downtime, they’ll still have access to phone calls and the apps you select on their Always Allowed list. You can edit this list anytime back in Screen Time settings. Of course, you’ll have to customize that list to what fits your family’s needs. The three Always Allowed list apps we use are Phone, Podcasts, and Audible. There are some pretty cool podcasts out there to help kids calm down and get ready for bed. We’ve leveraged that.
When they’ve reached the limit, this screen will appear and block them from using the app. It happens instantly, and it’s wonderful. Your kid will have the option to ask for more time (which they will…over and over again), and you will receive a notification on your Apple device. To let them use the app a little longer (approve for 15 minutes, an hour, all day, or don’t approve), swipe down on the notification and extend their time. Or tap “Don’t Approve” to keep the app locked. One benefit of the Apple iOS ecosystem is all your Apple devices work in unison and communicate flawlessly with each other. If you’re working on your Mac and get an “Ask For More Time” alert, you can approve it right there on your Mac. If you’re on your iPad, it’ll come through on your iPad. Most of these requests will show up on your Apple Watch (if you have one) and that makes it really nice to have that functionality (and power) right on your wrist.
It’s Not About Control. It’s About Empowerment
All too often, we are seeking out solutions for maximum control on how our kids use their devices. And that’s up to you as a parent to decide if that’s the right course of action. Some parenting styles are more full-control and others are a little laxer in nature. With these screen time guidelines in place, you can help your family make the most of the time they spend on their devices. Of course, it’s not the BEST solution if you want a lot of control, but what screen time can deliver is unique in the way that it can lead to conversations about how your family is interacting and using technology. Even for yourself, to be able to see usage stats and how you’re spending time on apps can and will be an eye-opener at first. We think Screen Time is a clever way to make you and your family more aware of their tech habits and how you can use technology in a way that benefits and empowers your life instead of becoming beholden to the devices we are so close to.